Building and Publishing Design Systems | Part 2

Learn how to build and publish design systems effectively. Discover best practices for creating reusable components and enhancing UI consistency.

This blogpost is a part of the "Building Design System and Micro Frontends" series. For more content, read the first post. The source code for all parts of this series can be found in this GitHub repository.

For building our design system, we will use react, tailwind, storybook and webpack.

The blogposts of this series
1. Building design system and micro frontends
2. Building and publishing a design system (you are here)
3. Building micro frontends consuming a design system
4. Building a shell application for micro frontends


A few words why I selected these technologies

  • React
    Proven, stable, excellent component composition system, focus on back-compatibility. Read the "Design Principles" post on reacts blog; this post outlines react development guiding principles.
     

  • Tailwind
    Gives us a simple way to define seed for the design system. Sizes/Distances scale, colour palettes, shadows, responsive breakpoints, transitions and animations etc., all can be defined succinctly. It also gives us ultimate style isolation and a big productivity boost.
     

  • Storybook
    Helps us develop components in isolation. Helps in component testing and, when exported, delivers portable documentation.
     

  • Webpack
    Proven, stable, vivid plugin ecosystem; a lot of materials.

Setting up a Design System Project

Create directory design-system and run the following commands from it:

npm init -y will setup package.json file.

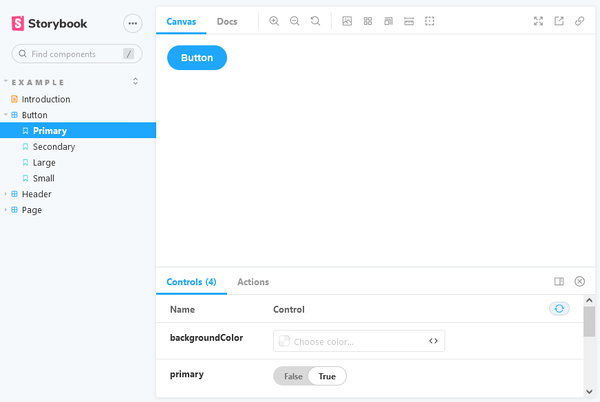
Run npm run storybook to build and run storybook. It should bind to port 6006. Open http://localhost:6006. You should see some example stories.

The npx sb init command takes care of setting up the storybook. It will create a stories directory with examples in the project root directory. You can remove its content. We will create a simple story later from scratch.


Settin up Tailwind

npm i -D tailwindcss@2.2.4  postcss@8.3.5
npx tailwindcss init

npx tailwindcss init will create ./tailwind.config.js file with the default configuration.

Open ./tailwind.config.js Add mode property and set purge patterns (lines 2,3).

module.exports = {
  mode: "jit",
  purge: ["./src/**/*.js", "./src/**/*.html"],
  darkMode: false, // or 'media' or 'class'
  theme: {
    extend: 
  ,
  variants: {
    extend: 
  ,
  plugins: [],
}

Create ./postcss.config.js in root directory.

Paste following code in ./postcss.config.js:

module.exports = {
  plugins: {
    tailwindcss: {},
    autoprefixer: {}
  
}

This configuration file adds tailwindcss and autoprefixer plugins to PostCss processing pipeline.


Setting up Tailwind for Storybook

In the next two steps we will set up tailwind for storybook. We need to install appropriate plugin and configure it.

Install @storybook/addon-postcss addon for storybook.

npm i -D @storybook/addon-postcss@2.0.0

Update ./.storybook/main.js; add highlighted configuration to addons array:

module.exports = {
  stories: [
    "../stories/**/*.stories.mdx",
    "../stories/**/*.stories.@(js|jsx|ts|tsx)",
  ],
  addons: [
    "@storybook/addon-links",
    "@storybook/addon-essentials",
    {
      name: "@storybook/addon-postcss",
      options: {
        postcssLoaderOptions: {
          implementation: require("postcss"),
        },
      },
    }
  ],
  core: {
    builder: "webpack5",
  },
};

Create file ./src/styles.css.

Paste following code in ./src/styles.css:

@tailwind base;
@tailwind components;
@tailwind utilities;

Open ./.storybook/preview.js and add import styles (line 1).

import '../src/styles.css'

export const parameters = {
  actions: { argTypesRegex: "^on[A-Z].*" },
  controls: {
    matchers: {
      color: /(background|color)$/i,
      date: /Date$/,
    },
  },
}

Create Component and Story

Create Button.js file in ./src/components with the following content

import React from "react";

export default function Button({label, disabled, children}) {
  return (
    
  );
}

In ./stories directory create `Button.stories.js` file with the following content:

import React from 'react';

import Button from '../src/components/Button';

export default {
    title: 'Example/Button',
    component: Button,
    argTypes: {
        label: {control: 'text'},
        disabled: {control: 'boolean'}
    },
};

const Template = (args) => 

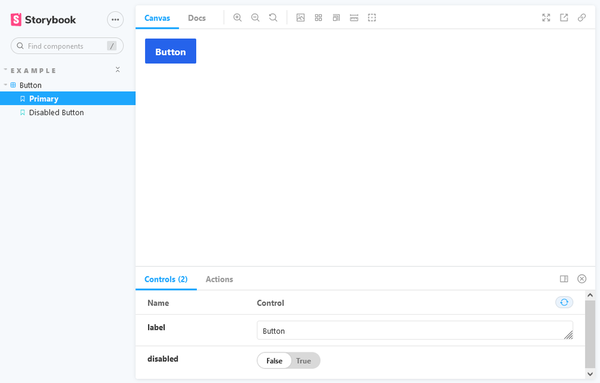
Run npm run storybook. Open http://localhost:6006. You should see something like this:

Building Design System Package

It is time to create production build of our design system. It should contain only necessary code. We will exclude react from the build. The assumption here is that whoever is consuming design system will be responsible for including react.

In a real project design system should be packaged and published to a npm repository so the other project can use npm to get it. However, for this walkthrough, we will build it and keep it in a directory on the disk. Other projects that we build in the next post will consume it from the disk.

Create an entry point for our library; Create ./src/index.js and add the following content:

import './styles.css'
import Button from "./components/Button";

export   

Every component in our design system must be imported and re-exported in this file.

Install following packages:

npm i -D webpack@5.38.1 webpack-cli@4.7.2  @babel/preset-env@7.14.4 @babel/preset-react@7.13.13 babel-loader@8.2.2 cross-env@7.0.3 css-loader@5.2.6 mini-css-extract-plugin@2.1.0 css-minimizer-webpack-plugin@3.0.2 postcss-loader@5.3.0 style-loader@2.0.0

Create file ./.babelrc with the following content:

{
  presets: [
    [
      '@babel/preset-env',
      {
        modules: false
      }
    ],
    '@babel/preset-react'
  ],
  plugins: []
}

Create file ./webpack.config.js with the following content:

const path = require('path');
const MiniCssExtractPlugin = require("mini-css-extract-plugin");
const CssMinimizerPlugin = require('css-minimizer-webpack-plugin');
const config = {
  entry: [
    './src/index.js'
  ],
  output: {
    path: path.resolve(__dirname, 'dist'),
    filename: '[name].js',
    library: {
      name: "fitness",
      type: "umd"
    }
  },
  externals: {
    "react": "react",
    "react-dom": "react-dom"
  },
  module: {
    rules: [
      {
        test: /\.(js|jsx)$/,
        use: 'babel-loader',
        exclude: /node_modules/
      },
      {
        test: /\.css$/,
        use: [
          MiniCssExtractPlugin.loader, 'css-loader', 'postcss-loader'
        ]
      }
    ]
  },
  resolve: {
    extensions: [
      '.js',
      '.jsx',
      '.css'
    ]
  },
  plugins: [
    new MiniCssExtractPlugin({
      filename: '[name].css'
    })
  ],
  optimization: {
    minimizer: [
      new CssMinimizerPlugin()
    ]
  }
};

module.exports = (env, argv) => {
  config.output.filename = '[name].js';
  return config;
};

There is a lot of things going on in this file; so lets break it out:

  • Line 6 - we define an entry point for our library, all components exported in this file will be available for consumers.

  • Line 9 - the output of the build will be saved to dist folder

  • Lines 11-14 - we configure webpack to create a library and use UMD for modules.

  • Lines 16-19 - we externalize react. This way it is not packaged with the library.

  • Lines 20-41 - standard configuration for building js, jsx and CSS

  • Lines 42-46 - add plugin for CSS extractions

  • Lines 47-52 - configure CSS minification


The last step is to add npm script; add following line to package.json scripts array:

"build-design-system": "cross-env NODE_ENV=production webpack --mode production"

To build the design system run npm run build-design-system.

There should be two files in the dist directory. main.js (5KB), and main.css (7KB).

Blog 7/15/21

Building a micro frontend consuming a design system | Part 3

In this blopgpost, you will learn how to create a react application that consumes a design system.

Blog 11/15/22

5 lessons from running a (remote) design systems book club

Last year I gifted a design systems book I had been reading to a friend and she suggested starting a mini book club so that she’d have some accountability to finish reading the book. I took her up on the offer and so in late spring, our design systems book club was born. But how can you make the meetings fun and engaging even though you're physically separated? Here are a couple of things I learned from running my very first remote book club with my friend!

Technologie Übersicht 3/31/21

Azul Systems

Azul Systems is a leading company with a 100% focus on Java and the Java Virtual Machine (JVM) - numerous companies worldwide rely on its open source Java platform.

Blog 7/13/21

Composite UI with Design System and Micro Frontends

Discover how to create scalable composite UIs using design systems and micro-frontends. Enhance consistency and agility in your development process.

Blog 7/16/21

Building A Shell Application for Micro Frontends | Part 4

We already have a design system, several micro frontends consuming this design system, and now we need a shell application that imports micro frontends and displays them.

Hintergrundgrafik für IPG Partner Clearsky
Blog 12/14/21

Bring IT service management and IAM systems together

How do companies bring their complex IT service management and IAM systems together in an end user-friendly way? In our interview, Clear Skye and the IPG Group show, how it works very easily

Blog 9/13/22

Introduction to Functional Programming in F# – Part 2

Explore functions, types, and modules in F#. Enhance your skills with practical examples and insights in this detailed guide.

Blog 11/14/23

Part 2: Data Analysis with powerful Python

Analyzing and visualizing data from a SQLite database in Python can be a powerful way to gain insights and present your findings. In Part 2 of this blog series, we will walk you through the steps to retrieve data from a SQLite database file named gold.db and display it in the form of a chart using Python. We'll use some essential tools and libraries for this task.

News 11/4/24

EverIT becomes part of catworkx and TIMETOACT GROUP

Cologne/Budapest, 4 November 2024 – catworkx (part of TIMETOACT GROUP), a leading partner for Enterprise integration based on the Atlassian platform, is acquiring EverIT, a specialized Hungarian based Atlassian Partner. Together, the companies will build on their long-standing relationship and expand catworkx’s leading market position into Central Eastern Europe and strengthen catworkx’s global offering. The parties agreed not to disclose the details of the transaction.

Blog 6/16/23

CSS :has() & Responsive Design

In my journey to tackle a responsive layout problem, I stumbled upon the remarkable benefits of the :has() pseudo-class. Initially, I attempted various other methods to resolve the issue, but ultimately, embracing the power of :has() proved to be the optimal solution. This blog explores my experience and highlights the advantages of utilizing the :has() pseudo-class in achieving flexible layouts.

Blog 3/11/21

Introduction to Web Programming in F# with Giraffe – Part 2

In this series we are investigating web programming with Giraffe and the Giraffe View Engine plus a few other useful F# libraries.

Blog 11/30/22

Part 2: Detecting Truck Parking Lots on Satellite Images

In the previous blog post, we created an already pretty powerful image segmentation model in order to detect the shape of truck parking lots on satellite images. However, we will now try to run the code on new hardware and get even better as well as more robust results.

Blog 7/22/24

So You are Building an AI Assistant?

So you are building an AI assistant for the business? This is a popular topic in the companies these days. Everybody seems to be doing that. While running AI Research in the last months, I have discovered that many companies in the USA and Europe are building some sort of AI assistant these days, mostly around enterprise workflow automation and knowledge bases. There are common patterns in how such projects work most of the time. So let me tell you a story...

News 11/4/24

EverIT becomes part of catworkx and the TIMETOACT GROUP

catworkx (part of the TIMETOACT GROUP), a leading partner for enterprise integration based on the Atlassian platform, is acquiring EverIT, a specialized Hungarian Atlassian partner.

Blog 11/27/23

Part 4: Save Time and Analyze the Database File

ChatGPT-4 enables you to analyze database contents with just two simple steps (copy and paste), facilitating well-informed decision-making.

Blog 11/12/20

Announcing Domain-Driven Design Exercises

Interested in Domain Driven Design? Then this DDD exercise is perfect for you!

Kompetenz 2/10/20

Certificates and awards

Our company and our products have won awards in the truest sense of the word. Among other things, SAP has certified our software solutions several times with various seals of approval.

Blog

Crisis management & building a sustainable future with AI

Non-profit organizations develop AI models to tackle global challenges - and draw lessons for businesses worldwide

Headerbild zur offenen und sicheren IT bei Versicherungen
Service

Open and secure IT

Just a few years ago, insurers were reluctant to move into the cloud or platform world. Concerns about security and governance often prevailed. The paradigm has changed.

Schild als Symbol für innere und äußere Sicherheit
Branche

Internal and external security

Defense forces and police must protect citizens and the state from ever new threats. Modern IT & software solutions support them in this task.

Bleiben Sie mit dem TIMETOACT GROUP Newsletter auf dem Laufenden!